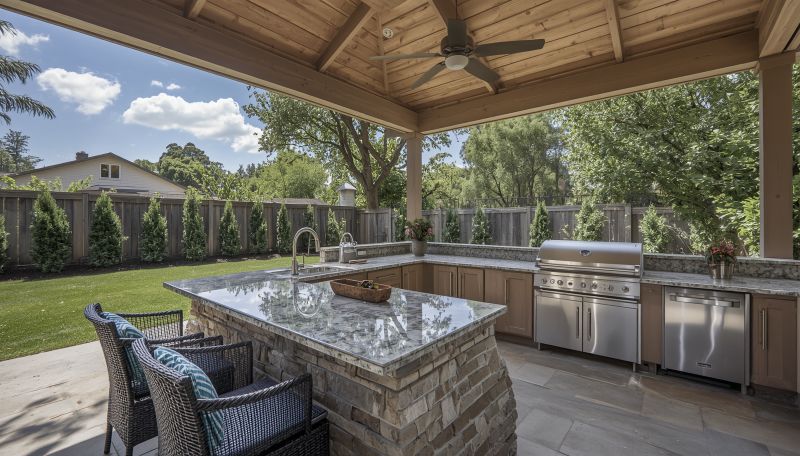
You can build a fully functional outdoor kitchen on a budget of $500 to $3,000 without hiring an outdoor kitchen contractor. Austin homeowners are uniquely positioned to enjoy an outdoor kitchen year-round, and the right materials, layout, and build sequence make all the difference before you spend a single dollar. This step-by-step guide covers everything from planning and budget tiers to the build process and the costly mistakes most DIY guides skip.
What Does an Outdoor Kitchen Actually Cost in Austin?
Before picking up a tool, know your number. Austin’s outdoor living season runs nearly 10 months out of the year, which means your outdoor kitchen works harder than it would in most of the country. Here is a clear breakdown by budget tier based on 2025 material and labor averages from HomeAdvisor’s outdoor kitchen cost report:
Budget Tier | Total Cost Range | What You Get | Best For |
Starter | $500 to $1,000 | Grill island frame and countertop, no plumbing | First-timers, small patios, renters |
Mid-Range | $1,000 to $2,500 | Grill island, sink, 2 to 3 storage drawers, basic countertop | Homeowners who grill 2 to 3 times per week |
Full Build | $2,500 to $5,000 | L-shaped counter, sink, fridge, storage, stone or tile finish | Entertainers, permanent installs |
Professional installation for the same builds runs $8,000 to $22,000, according to the same HomeAdvisor data. DIY saves 60 to 80% on labor if you follow the right sequence. If you reach a point where you want a fully integrated outdoor living space, the team at Cutters Pools offers professional outdoor kitchen design and build services in Austin and surrounding areas.
Step 1: Plan Your Layout Before You Buy Anything
The single biggest budget mistake is buying materials before locking in a layout. In Austin’s climate, placement also affects how much direct afternoon sun your cooking surface gets and how well the space ventilates during hot summer evenings. Start with a sketch on paper, then answer these four questions:
- How close to the house? Placing the kitchen within 10 feet of an exterior wall lets you tap existing gas, water, or electrical lines instead of running new ones, saving $300 to $800 in utility extensions.
- What is the traffic flow? You need at least 42 inches of clearance between the grill and any seating area. Less than that is a safety hazard and makes cooking uncomfortable.
- What shape fits your space? A straight run is cheapest. An L-shape adds roughly 30% to material cost but gives far more working surface. A U-shape is premium territory and pairs well with a covered pergola or cabana.
- Do you need permits? Austin and surrounding municipalities require a permit if you add gas lines, electrical, or a permanent structure over a certain square footage. Check with your local building department before pouring any concrete footings.
A free tool like SketchUp Free lets you model the layout in 3D before buying a single 2×4. Thirty minutes of planning here saves hours of rework later.
Step 2: Choose the Right Frame Material for Texas Weather
Your frame is the skeleton of the whole build. Austin summers push heat indexes above 105 degrees Fahrenheit and the area sees humidity spikes, flash rain, and occasional freezing events. The material you pick needs to handle all of it. There are three real options for a budget DIY outdoor kitchen:
Frame Material | Cost (10-ft run) | Texas Weather Durability | Build Difficulty |
Steel stud framing | $80 to $120 | Excellent (will not rot, warp, or crack in freeze-thaw) | Easy: tin snips and screws |
Concrete block (CMU) | $150 to $250 | Excellent (fireproof, waterproof, handles heat extremes) | Medium: mortar work required |
Pressure-treated wood (2×4) | $60 to $90 | Fair (degrades faster near heat and humidity) | Easiest: standard carpentry |
Best budget pick for Austin: steel stud framing. It is cheaper than CMU, resists the humidity that speeds up wood rot in Central Texas, and assembles in a day with basic tools. Most Austin-area home improvement stores carry 25-gauge steel studs by the bundle.
Avoid pressure-treated wood directly behind a grill. The USDA Forest Products Laboratory notes that wood within 18 inches of an open flame degrades significantly faster, even treated lumber.
Step 3: Build the Grill Island Frame
This is the core of your outdoor kitchen. Here is the exact sequence for a steel-stud grill island that fits a standard 36-inch built-in grill (the most common size):
- Mark the footprint. Use stakes and string to mark your island perimeter on the patio surface. Standard grill island depth is 30 inches; width depends on your grill size plus at least 12 inches of counter on each side.
- Lay the bottom track. Screw steel bottom track to the patio surface or concrete slab with masonry screws every 16 inches. This anchors the entire structure.
- Cut and attach vertical studs. Set studs every 16 inches on center. Use a level at every stud. A crooked frame makes every subsequent step harder.
- Add the top track and header. The header above the grill opening should be double-framed to handle the weight of the countertop above it.
- Sheathe with HardieBacker cement board. Cement board is water-resistant, fire-safe, and costs about $10 to $14 per 3×5 sheet. Do not use standard drywall as it will not survive Austin’s outdoor moisture cycles.
- Apply your finish. Stone veneer panels ($3 to $6/sq ft) complement Austin’s Hill Country aesthetic beautifully. Large-format outdoor tile ($2 to $5/sq ft) is cheaper and easy to clean. Stucco is the most affordable finish at roughly $0.80 to $1.50/sq ft applied.
Total material cost for a basic 6-foot grill island using this method: $350 to $600, not including the grill itself.
Step 4: Install a Budget-Friendly Countertop
Countertop material is where most DIY budgets blow up. Natural granite and quartz cost $60 to $120 per square foot installed. For an Austin outdoor kitchen, you have three affordable alternatives that hold up well in Texas heat:
- Poured concrete: Build a melamine form, pour standard concrete mix, and add a penetrating sealer once cured. Cost: roughly $5 to $10 per square foot in materials. Concrete takes 28 days to reach full strength. Seal it annually to prevent staining from the oils and grease that come with backyard cooking.
- Bullnose tile over cement board: Lay 12×24 outdoor-rated porcelain tile on a cement board substrate with exterior-grade thinset and unsanded grout. Cost: $3 to $8 per square foot. The most DIY-friendly option with no special mixing or curing required.
- Recycled granite remnants: Stone yards in Austin sell off-cuts and remnants from kitchen installs at 40 to 70% off retail. A 30×72 inch countertop can often be found for $80 to $200. Call local stone yards directly as they rarely advertise remnants online.
Step 5: Add a Sink Without Running New Water Lines
A sink immediately elevates your outdoor kitchen’s functionality, but most budgets skip it assuming it requires a plumber. It does not, if you plan smart.
The most budget-friendly approach is to connect to an existing outdoor hose bib using a Y-splitter and braided hose line. Run a drain line to a nearby garden bed or into a bucket. This is not a code-compliant permanent plumbing install, but for a patio kitchen used seasonally it works well and costs under $60 in parts.
If you want a permanent connection, a licensed plumber can run a short cold-water line from an exterior wall for roughly $200 to $400 in the Austin area, far less than a full interior plumbing job. Adding a hot-water line pushes the cost to $600 to $1,200, which is typically not worth it for a budget build.
Step 6: Plan for Lighting and Power
Austin evenings are prime entertaining time for most of the year. Rather than running a new circuit, which costs $400 to $800 with an electrician, consider these budget alternatives:
- Solar-powered string lights: $20 to $50, zero wiring, and surprisingly bright with modern LED panels. Austin’s 300-plus days of annual sunshine means solar charges efficiently all year.
- Battery-operated LED puck lights: Mount inside cabinets and under the counter overhang. Recharge via USB. Cost: $25 to $60 for a set of 6.
- GFCI outdoor extension from interior outlet: If your home’s nearest outlet is within 25 feet, a properly rated outdoor extension cord is a code-compliant temporary power solution in most jurisdictions. Use a weatherproof outlet cover.
If you want a dedicated circuit, hire a licensed electrician. Outdoor kitchen electrical work near water and gas is not the place to cut corners.
5 Budget Mistakes That Cost More Than They Save
Most budget outdoor kitchen guides tell you what to buy. Here is what to avoid. Each of these mistakes ends up costing more to fix than skipping it would have saved, particularly in Texas’s demanding outdoor conditions:
- Using indoor appliances outdoors. A standard indoor fridge placed outside voids the warranty, runs inefficiently in Austin’s summer heat, and often fails within one season. Outdoor-rated mini fridges cost $150 to $350 and are worth every dollar.
- Skipping a weather cover on the grill opening. A built-in grill with no protective cover collects water in the burner box during Texas storms, accelerating corrosion. Grill covers cost $20 to $40 and extend grill life by years.
- Not sealing concrete countertops annually. Untreated concrete absorbs grease, meat juices, and UV damage. A $15 bottle of penetrating concrete sealer applied once a year prevents permanent staining.
- Building too close to the property line. Austin and surrounding cities require outdoor structures to be at least 5 feet from the property line. Building closer could mean having to tear it down.
- Choosing style over material durability. Cedar looks beautiful fresh but grays, cracks, and warps in Central Texas heat and humidity. The extra $30 to $50 spent on steel studs or CMU blocks pays for itself in the first summer.
Repurposed and Recycled Material Ideas That Actually Work
The biggest differentiator between a $500 outdoor kitchen and a $2,000 one is often sourcing, not design. A few real-world options that work for Austin homeowners:
- Facebook Marketplace and Craigslist granite remnants: Search “Austin granite remnant” and homeowners who have just remodeled often give away leftover slabs for $0 to $50.
- Habitat for Humanity ReStore: These nonprofit resale stores sell surplus and donated building materials including cabinets, tile, sinks, and hardware at 50 to 80% below retail.
- Old metal filing cabinets: Steel filing cabinets make surprisingly durable outdoor storage bases. Clean, sand, and coat with rust-inhibiting spray paint. Free or under $20 secondhand.
- Pallet wood for a bar surround: Heat-treated (HT-stamped) pallets can be broken down and used for decorative skirting around the outside of a steel or CMU frame. Not structural, purely aesthetic. Cost: $0.
When your outdoor kitchen vision grows beyond what a DIY build can deliver, Cutters Pools designs complete outdoor living spaces in Austin, including custom outdoor kitchens that integrate seamlessly with pools, hardscaping, and landscaping. Explore our portfolio of completed Austin outdoor projects for inspiration.
Frequently Asked Questions
How much does it cost to build an outdoor kitchen on a budget in Austin?
A basic DIY grill island with a countertop costs $500 to $1,000 in materials. A mid-range build with a sink and storage runs $1,000 to $2,500. Professional installation in the Austin area costs $8,000 or more, so DIY saves the majority of the budget.
What is the best frame material for an outdoor kitchen in Texas heat?
Steel stud framing is the best balance of cost and durability for Central Texas. It will not rot, warp, or crack in freeze-thaw cycles and handles Austin’s humidity far better than wood. Budget $80 to $120 per 10-foot run.
Do I need a permit for an outdoor kitchen in Austin?
A simple freestanding grill island with no gas, electrical, or plumbing usually does not need a permit. Adding any of those connections typically triggers a permit requirement. Always confirm with the City of Austin Development Services Department before starting construction.
What is the best countertop for an outdoor kitchen on a budget?
Porcelain tile over cement board is the most affordable at $3 to $8 per square foot and holds up well in Texas heat and UV exposure. Poured concrete costs $5 to $10 per square foot and looks premium. Granite remnants from Austin stone yards offer the best appearance at the lowest price.
How do I add a sink without hiring a plumber?
Attach a Y-splitter to your outdoor hose bib, run a braided line to a drop-in sink, and drain into a garden bed or bucket. The total parts cost is under $60 and no license is required. This works well for Austin’s long outdoor cooking season.
When should I hire a professional instead of building DIY?
If your outdoor kitchen includes gas lines, electrical circuits, a full plumbing connection, or integration with a pool deck or major hardscaping, hire a professional. The complexity and permitting requirements in Austin make those elements risky for DIY. Cutters Pools handles full outdoor kitchen builds from design through construction.